Quick heads-up: some of the links on this page are affiliate links. If you make a purchase through them, we may earn a small commission (at no extra cost to you). This small bit of income helps keep our site running.
Wedgemount Lake Trip Report and Hiking Guide
This trip report was last updated on December 22, 2023.
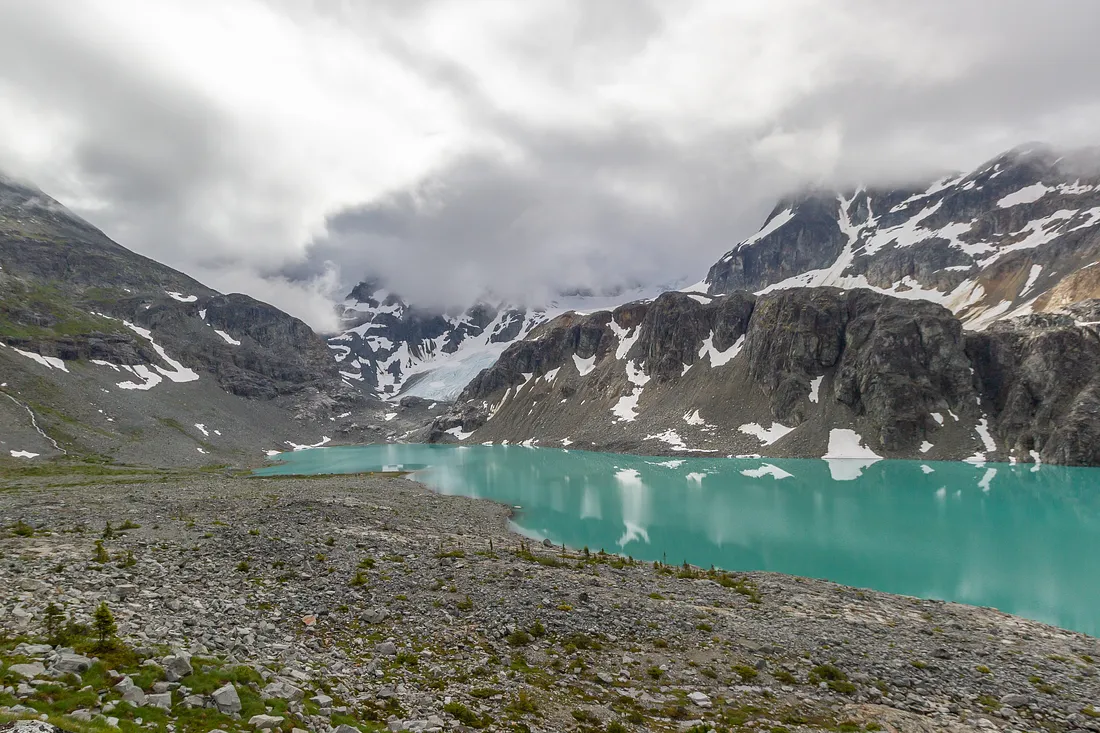
Wedgemount Lake is difficult to get to but well worth the effort. It's a beautiful alpine lake, surrounded by tall mountains in Garibaldi Park. It has a more remote feel than many of the other official camping options in the park, and there are several different peaks and treks you can do from the lake, if you've still got some energy left after hiking in.
Quick Facts
- Distance: 4.5 km to the hut at the lake
- Elevation: 1180 meters of elevation gain to the hut at the lake
- Time: About 3 to 4 hours to the hut with an overnight backpack
- Best Time of Year: July to September
- Access: 2WD access
- Difficulty: 3/5. The trail is well maintained and easy to follow, but there is a lot of elevation and some steep switchbacks.
Essential Gear
- Micro-spikes or Crampons: The Wedgemount glacier is something that most people will want to go see. It's easily accessed from the hut and is well worth the trip over there. If you do head there and you have any interest in walking a bit on the glacier, micro-spikes or crampons will help keep you safe.
- Ultralight Gear: There's a lot of elevation between the trailhead and Wedgemount lake, so whatever you can do go lighten your load will go a long way. Gear like an ultralight tent, an ultralight sleeping bag, and an ultralight backpack will all help to make you feel a lot less tired when you do arrive at the lake. They're an investment, but backpacking gear will last you for years if treated well.
- Trekking Poles: The trail to Wedgemount Lake is definitely steep in sections. The last push before the lake especially is a steep switchback up some hardpacked gravel. Trekking poles are great for sections like this. Check out our trekking pole guide if you're looking for a pair.
Directions to the Trailhead
From Whistler, drive north on the highway. You should see signs for Wedgemount Lake, and a turn off on to a gravel road about 12 km North of Whistler.
You'll cross some train tracks, and then take a bridge over Green River. At this point you'll come to a fork, and you should see signs for Wedgemount Lake, directing you to the left fork. After a couple hundred meters you'll take a right on to Wedge Creek Forest Service Road. You'll drive down this road for a couple kilometers to the Wedgemount Lake parking lot, where you'll begin hiking.
Permits
Camping at Wedgemount Lake was previously unpermitted, and you could just show up and put down a tent wherever you liked. Wedgemount Lake became a bit too popular for it's own good, however, and a permit is now required to camp there year round.
Campsites can be reserved through the BC Parks camping portal. Click on the 'Backcountry' tab, select 'Garibaldi' as the park you want, and fill in the rest of the details.
Once you click the 'Search' button you should be able to select the Wedgemount Lake campground as one of the reservable options, and you can finish your reservation.
Reservations can be made 4 months in advance of the date you want to book, and Wedgemount Lake is reasonably popular during the popular summer months (July through September) so making a reservation well in advance is recommended during that time of year.
Camping Options
There are 20 camping spots available at Wedgemount Lake.
There are 10 camping spots near the cabin and the permanent toilet, which is up on a ridge near the outflow of the lake. These campsites are further away from the lake and the creek, which are the only water sources, but you can easily access the cabin and the toilet.
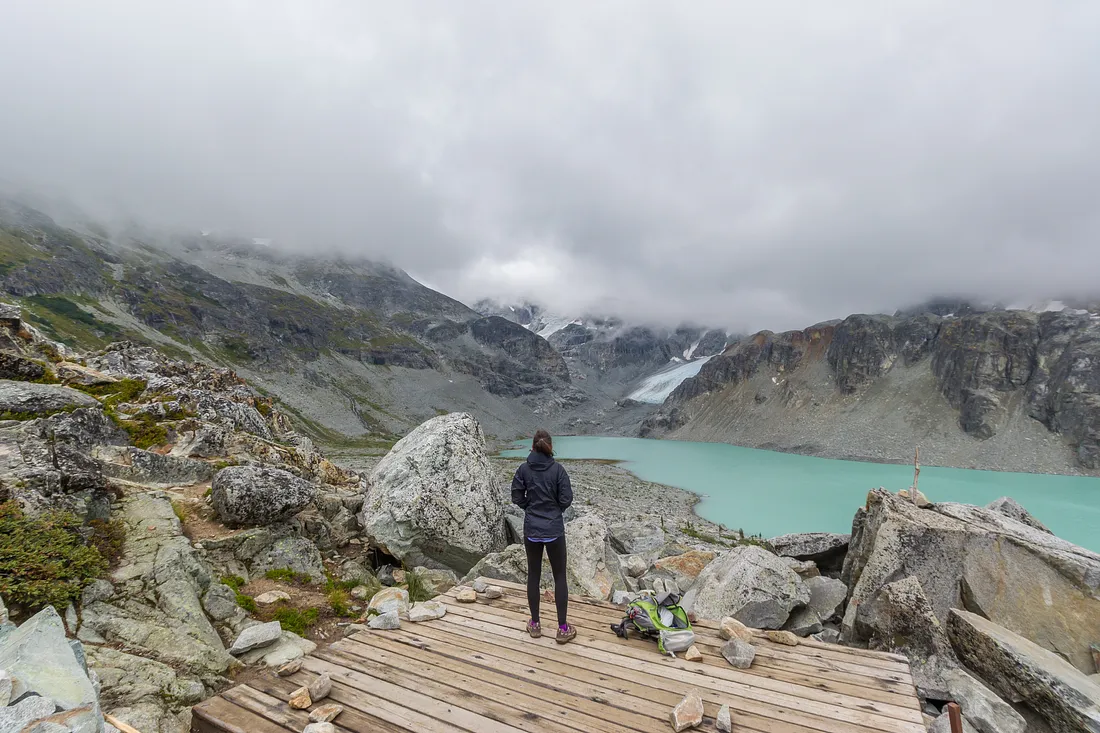
There are another 10 campsites down on the lake, about halfway down the length of it, on a large, gravelly flat area. There is a temporary toilet set up here during the summer months. Expect this toilet to be set up from July 1st through to September 15th.
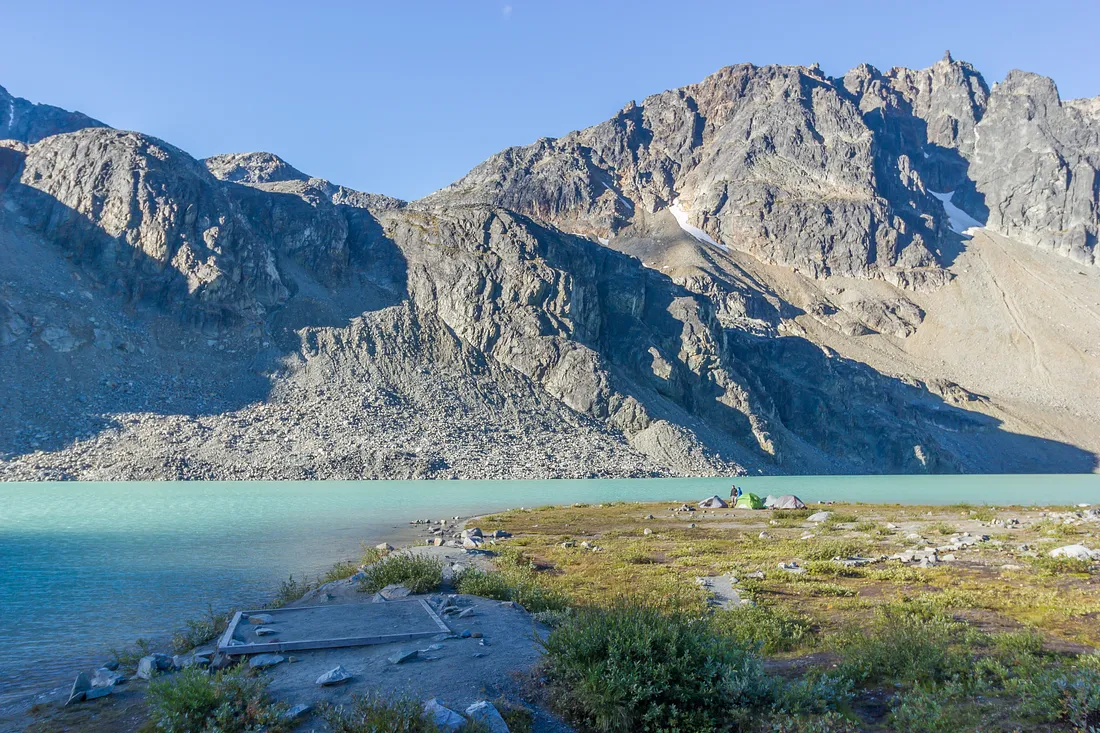
These lakeside campsites have great access to water (from the lake or a nearby creek), but you're further away from the permanent toilet, as well as the cabin, which is the only place to safely store food if you don't have a bear canister.
It's about 500 meters distance and 40 meters of elevation in between these 2 campsites.
The Wedgemount Lake Hut
The Wedgemount Lake hut is quite small. It's two small tables and two small benches, with a very small sleeping area up top. It's only meant to be used as an emergency shelter. If you're planning to camp at Wedgemount Lake you're expected to bring what you need to spend the night.
People are encouraged however to leave their food in the hut at night, to keep it away from bears. There are hooks and nails inside that you can hang your food bag from. Make sure you use these, as there are mice and they will ruin your food if you give them a chance.
The Hike to Wedgemount Lake
The hike in to the lake is on a well maintained trail, and most people won't have any trouble finding their way.

The trail steadily gains elevation over the entire length. You start out in the forest, with a few short sections navigating through large boulder fields. It's a lot of elevation to gain over a relatively short trail, so the grade is unforgiving the whole way. Expect to sweat! Especially if you're carrying a heavy backpack full of gear.
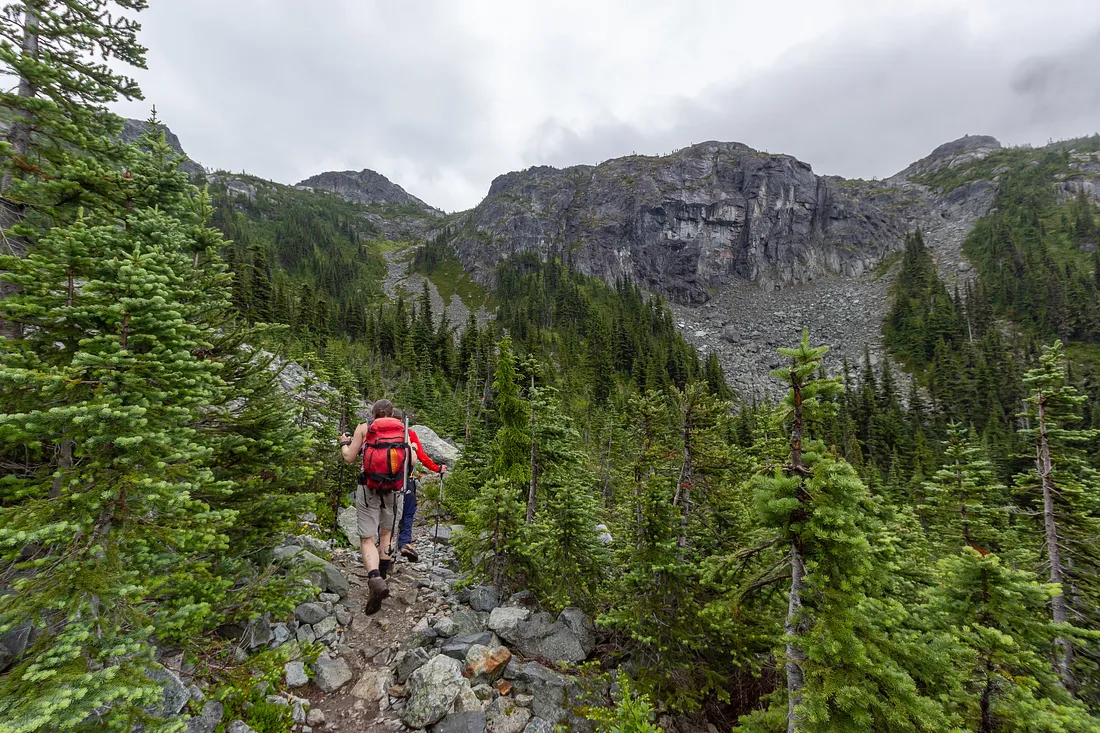
You'll know you're almost there when you exit the trees and begin to ascend up in to the alpine. There is one last large hill to switchback up, which pops you out on the plateau of the lake. You should see the cabin and the toilet in front of you at this point.
Nearby Mountains and Hikes
The Wedgemount Glacier
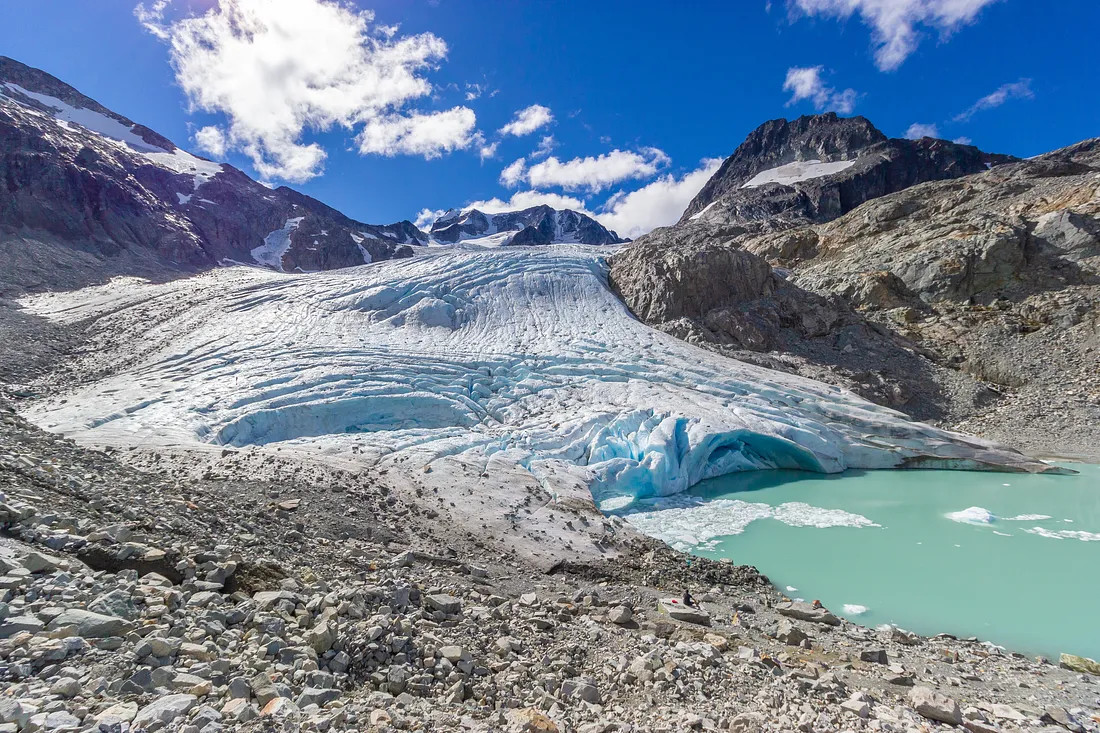
The Wedgemount Glacier is about an hour's hike from the hut and well worth checking out. It's located at the far end of the lake from the hut. The trail descends from the hut in to the flats beside the lake, then meanders up the rocks to the glacier. Unfortunately the glacier recedes and changes a little bit every year, so it probably won't look like the pictures here.
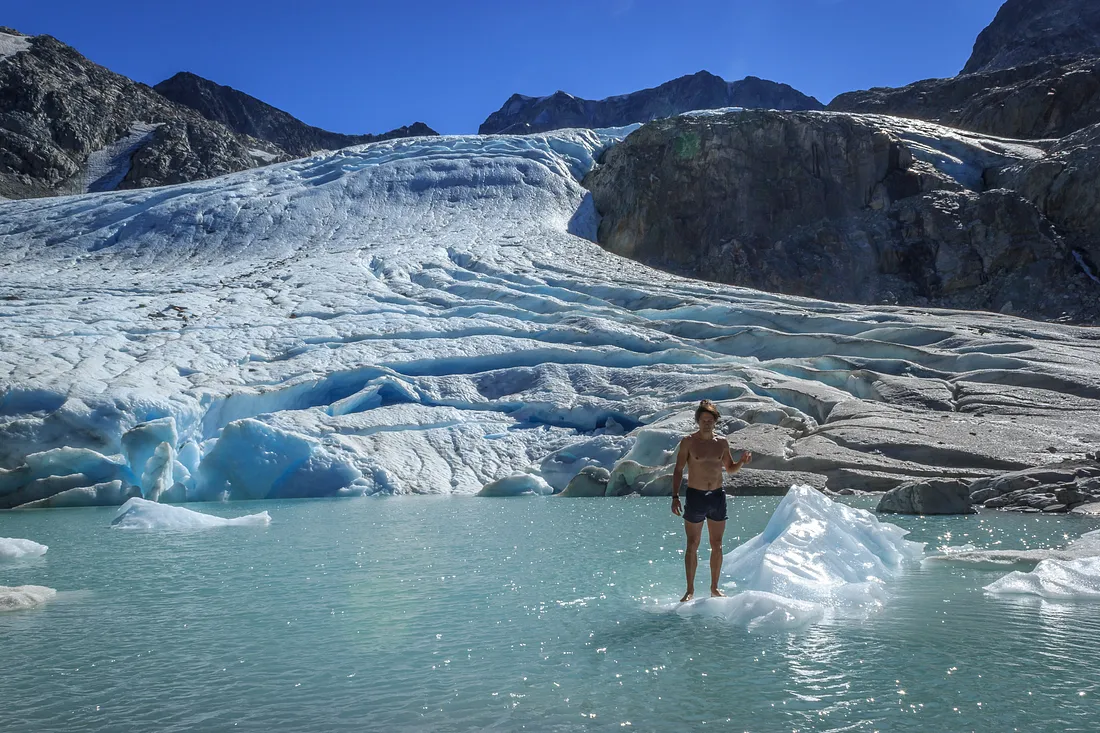
You can walk a bit on the glacier, but watch out for rotten ice and crevasses, and consider bringing some crampons or microspikes to give yourself some traction. A new, smaller lake has formed as the glacier recedes, which is Tupper Lake. You can swim in this lake, but it's quite cold!
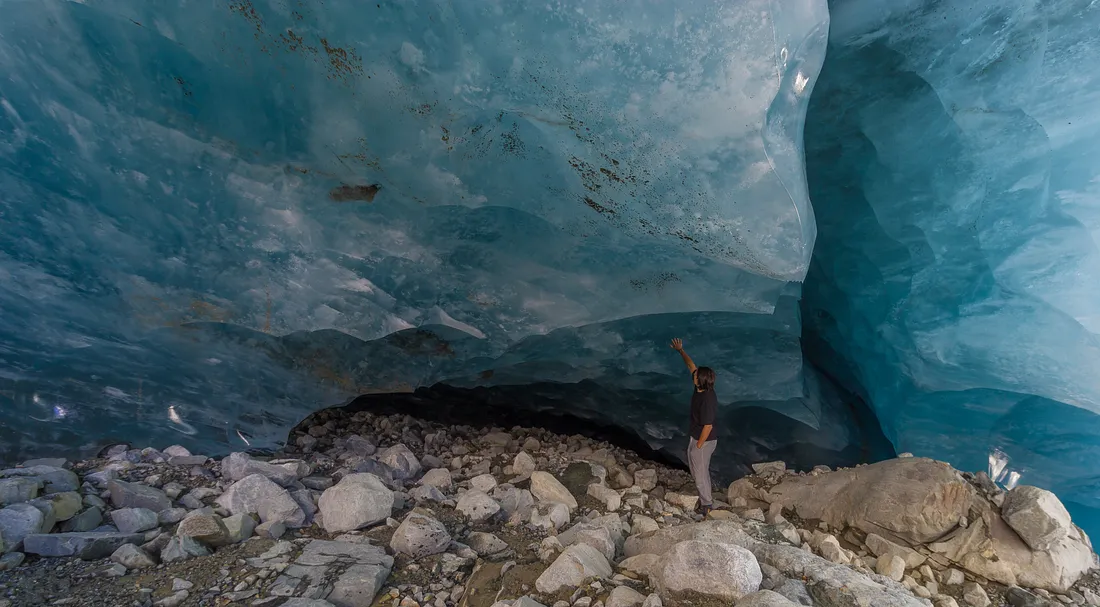
Depending on the current condition of the glacier there may also be some ice caves you can explore, either within the central glacier or up on the flanks of the glacier. These are beautiful but can also be dangerous.
Mount Cook
(2.5 km and 770 meters of elevation from the hut to the peak of Mount Cook)
Mount Cook is a lot of elevation, but is the easiest day hike from Wedgemount Lake. Mount Cook is the sub-peak North-East of the lake, below the taller Mount Weart. It's a straight-forward ascent up the rocky slopes.
Most people head directly north, aiming for the Western ridge of Mount Cook. Once you're on the ridge, it's an easy hike to the peak.
If you're curious about continuing from here to the peak of Mount Weart, check out the section on the Armchair Traverse below.
Mount Weart
(4 km and 930 meters of elevation gain from the hut to the peak of Mount Weart)
Mount Weart is the best peak to climb in the summer from Wedgemount Lake, and is a difficult hike. None of the terrain is super challenging, it's just a lot of elevation, especially if you've already hiked to the lake that day.
From the hut, you head towards the glacier at the far end of the lake. You pass the upper lake (Tupper Lake) and then veer left, up in to the basin above.
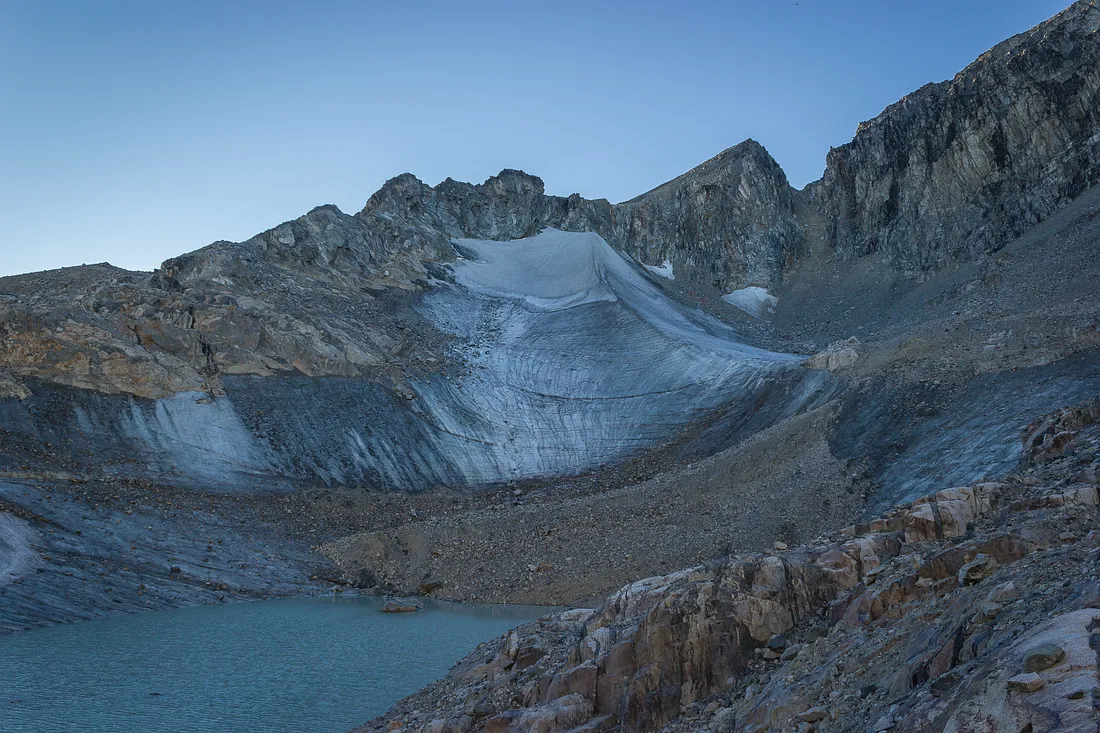
Once in the basin above there will be some pockets of glacier and a small alpine lake, surrounded by the Southern ridge of Mount Weart. The ridge might look difficult to ascend initially, but there is a good ramp you can use to ascend up to the ridge on the far side of the small lake.
When you're up on to the ridge, the route to the summit is easy hiking on rocky terrain.

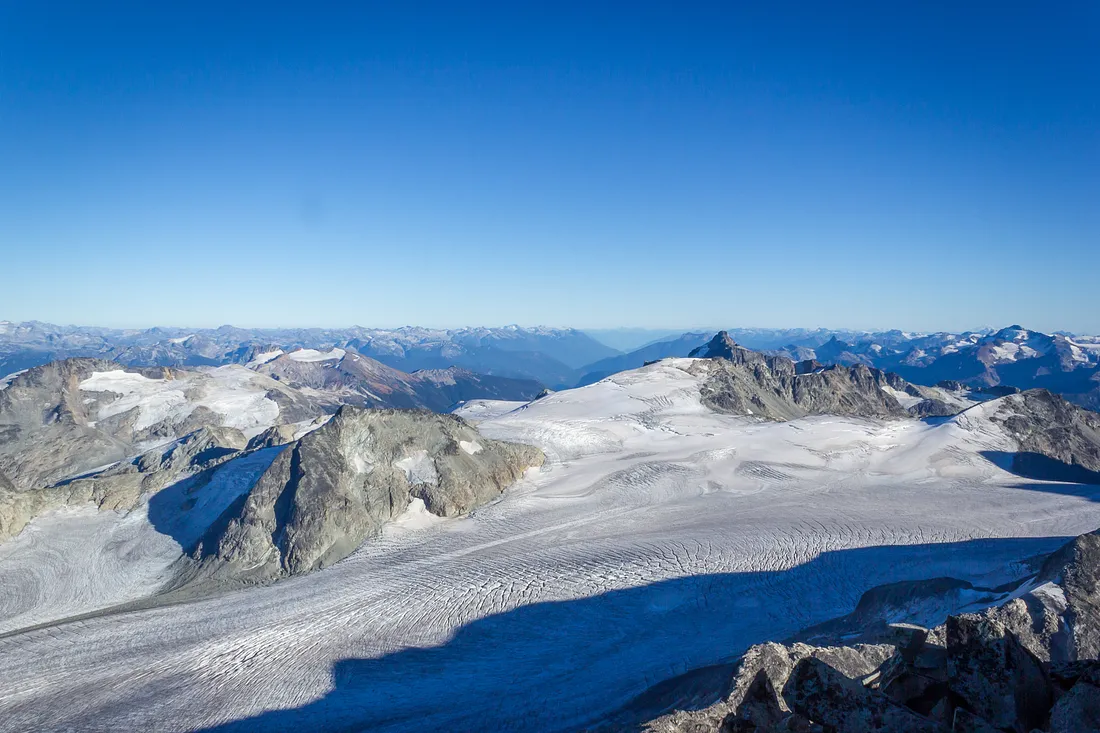
The views from the peak are fantastic. To the East is the massive Weart Glacier (pictured above). You can also look all the way down to Wedgemount Lake, and if the weather is good you can see Greendrop Lake and Whistler far in the distance.

You can head back down the way you came, or if you're feeling adventurous you can also continue along the ridge to Mount Cook, and eventually back to the lake. This is the Armchair Traverse, described below.
Parkhurst and Rethel Mountains
(4.5km and 790 meters of elevation from the hut to both peaks)
Parkhurst and Rethel Mountains are typically climbed together, so they're often mentioned together.
This is a challenging hike with some steep, technical terrain that you should only attempt if you feel confident in your abilities to get around safely in the mountains.
You start the hike by walking from the cabin to the outflow of Wedgemount Lake.
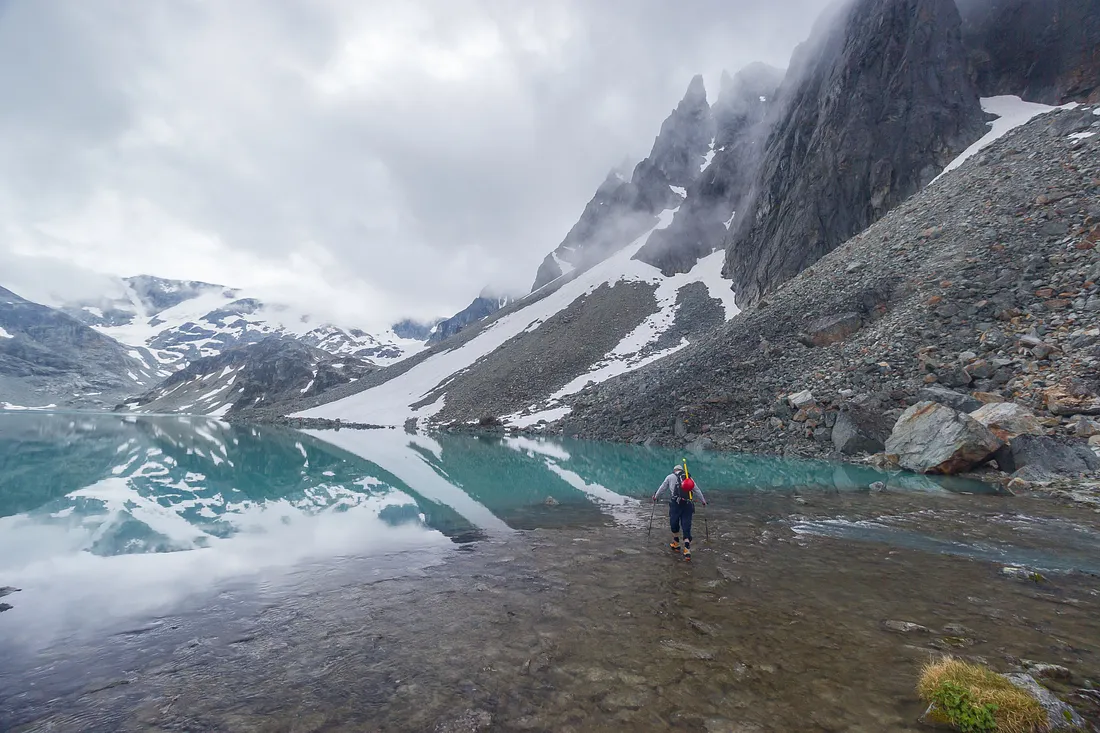
You'll need to cross the outflow of the lake. The terrain may change, but when I crossed it, it was wide and shallow. You can cross it wearing your boots if you trust the waterproofing, or take them off and wade across.
Either way, you probably won't find any strong currents here, so crossing should be straight-forward.
Once across, you start to contour along the lake, slowly gaining elevation up to a bench and another, smaller lake. You contour around this lake as well, heading up towards a break in the cliff band above that, in a good year, will have snow that you can make your way up.
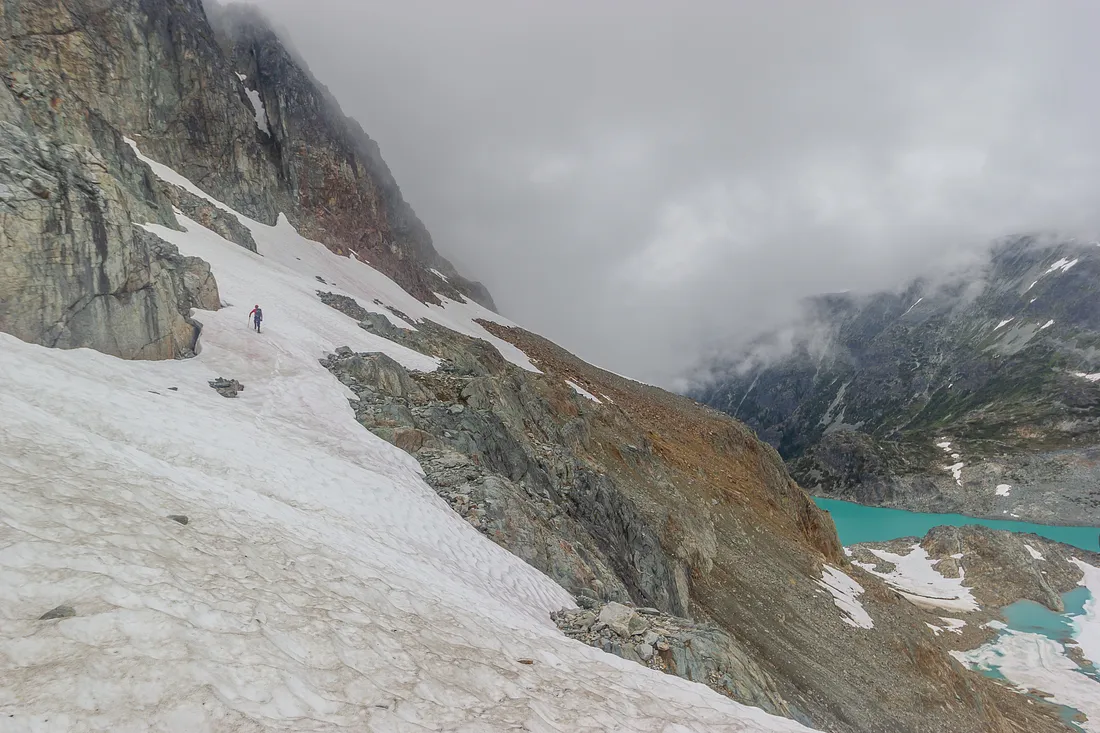
After that you want to traverse back the way you came (see picture above) to get around the next cliff band, and then traverse back in the opposite direction again.
For this section of traversing snow bands, it really helps to have an ice axe at minimum, and ideally a pair of crampons or microspikes. These bands of snow are steep and if you started to slide, you would very quickly find yourself sliding down in to rocks (or off cliff edges).
Finally, you should find a steep ramp below the Parkhurst and Rethel col. You want to take this ramp to the col, which pops you out on to easy hiking terrain.
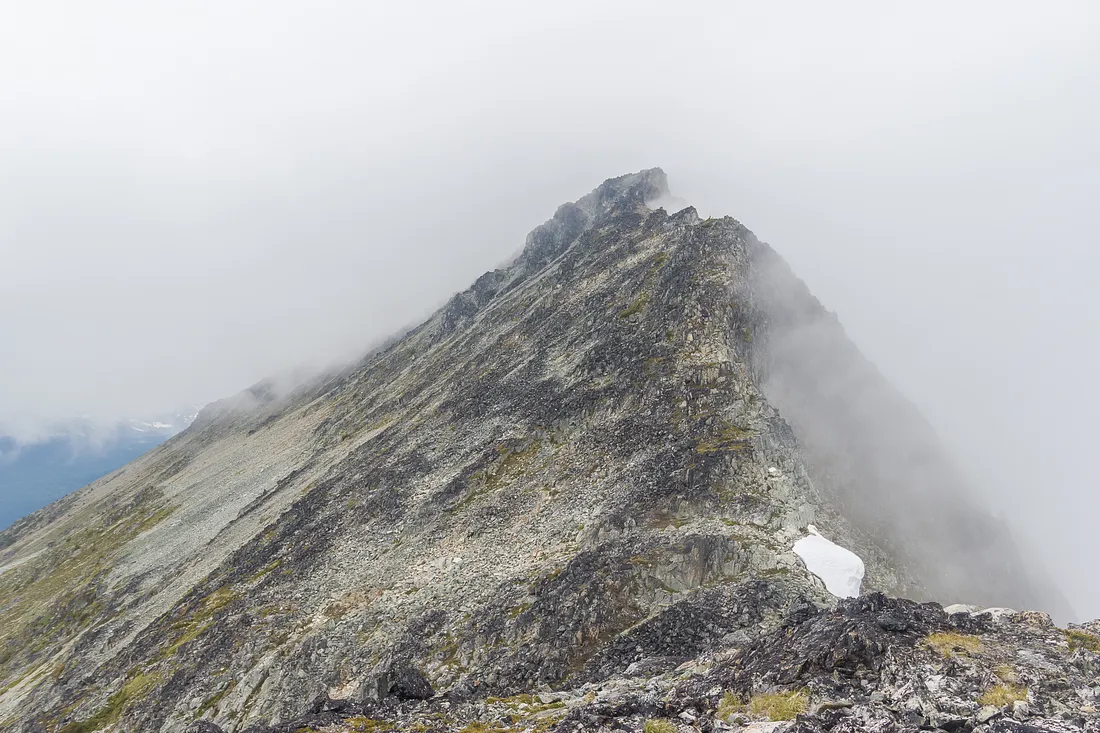
From here, you can head up to Parkhurst Mountain, Rethel Mountain, or both. The hiking up either one isn't challenging.
Wedge Mountain
(6 km and 1300 meters of elevation gain from the Wegemount Lake hut)

Wedge Mountain is a very long and somewhat challenging objective from the Wegemount Lake hut. It involves a lot of plodding up scree slopes, so many people do opt to do it in winter, when a more direct and fun route is an option.
However, it is the tallest mountain in Garibaldi Park, which makes it a worthwhile objective for many people.
You start the hike to Wedge Mountain by first getting to Parkhurst Mountain. See the directions above for that.
From the peak of Parkhurst Mountain you descend down easy scree slopes to the col between Wedge Mountain and Parkhurst Mountain.
From here you head South, further in to the basin, making for the bottom of the Western ridge of Wedge Mountain. Look for a reasonable line of ascent up to the top of the ridge. You may need an ice axe here, depending on snow conditions.
Once you're on the ridge, the rest of the way to the summit is straight-forward but tedious travel on loose scree, without any really challenging sections.
Armchair Traverse

The Armchair Traverse links Mount Cook and Mount Weart together, via the ridgeline between the two. The ridge is a challenging, 4th class scramble for big sections, so only attempt it if you're comfortable travelling on that kind of terrain in the mountains.
You can approach from either side. The guides above on Mount Weart and Mount Cook will help you to get to either of those peaks. From there it's just a matter of traversing the ridge to the other peak, and following the trail down from that peak.
FAQ
Can I bring my dog to Wedgemount Lake?
There are no dogs allowed anywhere in Garibaldi Park, and since Wedgemount Lake is inside of Garibaldi Park, that means you can't bring your dog to Wedgemount Lake.
Do I need a permit?
You do need a permit to camp overnight at Wedgemount lake year round, but you don't currently need a permit to do a day hike to the lake, or any of the surrounding mountains.
What is the best time of year to camp at Wedgemount Lake?
The best time of year for summer camping is July through September. Before July you may encounter some snow, depending on how much snow there was the previous winter. After September your chances of seeing rain and being very cold at night go up quite a bit.
Are there a lot of bugs?
There are some slightly marshy spots around Wedgemount Lake, so if it's a bad year or month for bugs, you can expect there to be bugs at Wedgemount Lake.
Are there any bears?
Bear sightings in Garibaldi Park (which is the park that Wedgemount Lake is in) are common, so definitely bring bear spray and a bear canister. Almost all sightings are of Black bears, but Grizzly bears are sighted once in awhile too.
Can I swim in the lake?
Yes! The lake is fed by the Wedgemount Glacier so it stays quite cold, but you can definitely swim in it. The area around the lakeside campsites makes a good spot to wade in, but anywhere is good.
Can I stay in the Wedgemount Lake hut?
Unfortunately no, you're only supposed to sleep in the hut in case of an emergency, and honestly it's not a very nice hut (and I believe it has mice) so you're better off staying in your own tent.
Can I have a fire at Wedgemount Lake?
No, fires are not allowed in Garibaldi Park (which Wedgemount Lake is inside of) any time of the year.
Gear Packing List
Sleeping + Shelter
- Sleeping bag
- Sleeping pad
- Pillow
- Tent
- Tent pegs
- Tent footprint
Cooking + Eating
- Stove
- Propane (or other fuel source)
- Lighter
- Pot and / or Pan
- Bowl / Plate
- Spork
- Biodegradable dish soap
- Breakfast
- Lunch
- Dinner
- Snacks
- Coffee (or tea)
Water
- Water bottle
- Water filter (the lake water is clean enough you can use water purification tablets too)
- Mug for hot drinks
Packing
- Backpack
- Backpack rain-cover (if the weather calls for it)
- Zip-locks and / or trash bag
- Food storage bag
- Bear Canister (There aren't really any trees to hang your food from at the lake. You can store your food in the hut too, however there are mice so make sure it's hung from a hook).
Feet
- Boots or Shoes
- Socks
- Sandals or Hut Booties for around camp
Hygiene
- Toilet paper
- Toothbrush + toothpaste
- Soap (make sure it's biodegradable)
Clothing
- Underwear
- Long underwear
- Base layer
- Down jacket and / or fleece
- Shirts
- Shorts or Pants
- Rain jacket (if the weather calls for it)
- Rain pants (if the weather calls for it)
- Hat
Around Camp
- Headlamp (plus extra batteries)
- Backpacking chair
- Knife
Misc
- Trekking poles
- Sunglasses
- Camera
- Cord or rope
- Bear spray
- First aid kit
- Mosquito spray
- Sunscreen
- Duct tape
- Backpacking towel (if you think you'll be taking a dip in the lake)
